One of the easiest ways to make your blog more user friendly is to add images - diagrams, illustrations, even photographs. But sometimes that's also one of the hardest - how do I start?
Well there is nothing special about an image. It's just a link to a file, where the file contains a picture or whatever.
How you include the link - embedded or not, makes the difference. An embedded link lets you view the image, directly, in the post. An external link lets you view the image, separately. Videos, aka moving photos, can be embedded in the blog posts.
And you do need to consider what you're going to do with the image. Replacing the default text title / description in the blog header will be a little bit of work. Blogger has a Configure Header widget, but it's not very replete with options yet.
Now having seen the possibilities, and the possibilities are practically endless, you need to be aware of the possible complications and limitations.
If you feature pictures in your posts, make sure that the pictures will fit. If in doubt, upload them with Small selected - let your readers click on the pictures to see the full size, and arrange them, within the available space, using tables. And please, whatever you do, don't embed full size pictures in the post.
If you have a photograph sitting on your computer, you can simply use Blogger, and upload the photograph. Once the photograph is uploaded, you can do whatever you like with it. Or you can use any third party hosting service. It's up to you to decide.
You can use Blogger images just like images that you upload to any online hosting service. If you have an image that you'll only be showing in one post, you can upload directly into that post. Or you can upload to any post, in any blog, and use that image in any other post, or any other blog, or the template in any blog, at your convenience.
This could be a key in working around some photo upload problems.
After you upload any images, in Edit HTML, find and copy the HTML for any desired photo as uploaded. Paste the HTML, as copied, into the Edit HTML window for any other post, in any blog of your choice. If you don't want any post, containing only uploaded images, to be visible, simply save that page as draft.
If you upload a lot of images into your posts, you'll want to plan and execute the uploads carefully, to save effort. The current Post Editor has a few idiosyncrasies as to how it uploads images.
The nice thing about Blogger hosting images is when you upload an image, a copy of the image, properly sized to fit in the post, is created. The upload process creates code that embeds the resized image ("thumbnail") into the post, with a hyperlink to the original image. Your readers can click on the image in the post, and see the original image, in full size.
First, upload the image to Blogger, or to any alternate photo hosting service.
Now, you can add an image URL to your post or template.
Or, add the image, as a thumbnail that's clickable to show the full sized photo, to your post.
Or, add the image as a button, linking to another post.
Check out my other recipes too (Just click on the picture)!
Or maybe you just want the full size version of the photo to open in a new window.
If you're in any way curious about how I setup this page, and showed the HTML so neatly, see my tutorial on anchors and HTML. And you can always examine the code for any specific page element, if you're using Firefox. Or check out the W3 Schools tutorials, that tell you all about each HTML tag, as used above.
You don't have to host your photos on Blogger. There are any number of free hosting services, such as Photobucket, Picasa, and Webshots, that will allow you to upload any number of pictures to their server. Peter, with Blogger Tips and Tricks: Comparison between hosting images with Blogger and photobucket, provides an interesting analysis of Photobucket.
Well there is nothing special about an image. It's just a link to a file, where the file contains a picture or whatever.
How you include the link - embedded or not, makes the difference. An embedded link lets you view the image, directly, in the post. An external link lets you view the image, separately. Videos, aka moving photos, can be embedded in the blog posts.
And you do need to consider what you're going to do with the image. Replacing the default text title / description in the blog header will be a little bit of work. Blogger has a Configure Header widget, but it's not very replete with options yet.
Now having seen the possibilities, and the possibilities are practically endless, you need to be aware of the possible complications and limitations.
- Consider your readers, and limit the size of your main page.
- Always be aware of the differences between the different browsers, and make sure that your blog looks good in both.
- Be sure to remove all gratuitous line breaks from your code, after copying what you see online.
- Center and group photos, while still allowing dynamic object arrangement, by using nested tables.
- Animated pictures (.gif) aren't reliable when published using Blogger; you'll probably have to use Google Documents, in a very messy workaround.
- If you have more than a couple pictures, you could display them in a slideshow. The mini slideshow aka Flickr badge, in the sidebar, makes a nice accessory to the blog, and the Flickr hosted slideshow is great for showing your photos in their full glory.
If you feature pictures in your posts, make sure that the pictures will fit. If in doubt, upload them with Small selected - let your readers click on the pictures to see the full size, and arrange them, within the available space, using tables. And please, whatever you do, don't embed full size pictures in the post.
- If you host the photos on Blogger, use the two size images code, as created by the upload.
- If you host the pictures on a third party service, you'll have to upload reduced size photos yourself.
If you have a photograph sitting on your computer, you can simply use Blogger, and upload the photograph. Once the photograph is uploaded, you can do whatever you like with it. Or you can use any third party hosting service. It's up to you to decide.
You can use Blogger images just like images that you upload to any online hosting service. If you have an image that you'll only be showing in one post, you can upload directly into that post. Or you can upload to any post, in any blog, and use that image in any other post, or any other blog, or the template in any blog, at your convenience.
This could be a key in working around some photo upload problems.
- There is a limit on volume of uploaded images for each blog. It's possible that the limit is being incorrectly identified, in some cases.
- Some uploading problems have been seen when attempting to upload to posts previously published. This suggests that post content may affect uploading.
After you upload any images, in Edit HTML, find and copy the HTML for any desired photo as uploaded. Paste the HTML, as copied, into the Edit HTML window for any other post, in any blog of your choice. If you don't want any post, containing only uploaded images, to be visible, simply save that page as draft.
If you upload a lot of images into your posts, you'll want to plan and execute the uploads carefully, to save effort. The current Post Editor has a few idiosyncrasies as to how it uploads images.
The nice thing about Blogger hosting images is when you upload an image, a copy of the image, properly sized to fit in the post, is created. The upload process creates code that embeds the resized image ("thumbnail") into the post, with a hyperlink to the original image. Your readers can click on the image in the post, and see the original image, in full size.
First, upload the image to Blogger, or to any alternate photo hosting service.
- Create a new post. I called mine "Images", you can use whatever name pleases you. Follow me, and see why.
- Upload a picture. Pick the proper picture float alignment when you upload. I use "float:left" for all of mine, since my sidebar is on the right. If your sidebar is on the left, "float:right" will be more useful.
- If the picture uploaded successfully, continue. If you are currently being victimised by the intermittent photo uploading problem, and you had no success this time, start over with Step 1.
- From the post edit window, select the "Edit HTML" tab. Find the code for your uploaded picture. Here's one of mine.
<a onblur="try {parent.deselectBloggerImageGracefully();} catch(e) {}" href="http://photos1.blogger.com/blogger/
5304/92/1600/DSCF0048%201280.1.jpg"><img style="float:left; margin:0 0 10px 10px;cursor:pointer; cursor:hand;" src="http://photos1.blogger.com/blogger/
5304/92/320/DSCF0048%201280.1.jpg" border="0" alt="" /></a> - Select and copy the code (for instance the example above).
- Save this post as Draft, so the post won't show up in the blog.
Now, you can add an image URL to your post or template.
- Look at the code, created by the image upload, which you just copied.
<a onblur="try {parent.deselectBloggerImageGracefully();} catch(e) {}" href="http://photos1.blogger.com/blogger/
5304/92/1600/DSCF0048%201280.1.jpg"><img style="float:left; margin:0 0 10px 10px;cursor:pointer; cursor:hand;" src="http://photos1.blogger.com/blogger/
5304/92/320/DSCF0048%201280.1.jpg" border="0" alt="" /></a> - Here's the URL of the thumbnail copy of the image.
http://photos1.blogger.com/blogger/
5304/92/320/DSCF0048%201280.1.jpg - Here's the URL of the full size copy of the image.
http://photos1.blogger.com/blogger/
5304/92/1600/DSCF0048%201280.1.jpg - Here's the thumbnail image, unclickable.
<img style="float:left; margin:0 0 10px 10px;cursor:pointer; cursor:hand;" src="http://photos1.blogger.com/blogger/
5304/92/320/DSCF0048%201280.1.jpg" border="0" alt="" /> - Obviously, the URL for your image will differ. Take either URL, and add it to your post or template, as you like.
Or, add the image, as a thumbnail that's clickable to show the full sized photo, to your post.
- Edit the post where you wish the picture to be viewed. From the post edit window, select the "Edit HTML" tab. Paste the copied code, into the location that pleases you.
- You now have a solitary photo, floating to the left, uncaptioned.
- Add some text, here I show some beside the photo, and some below the photo.
<a onblur="try {parent.deselectBloggerImageGracefully();} catch(e) {}" href="http://photos1.blogger.com/blogger/
5304/92/1600/DSCF0048%201280.1.jpg"><img style="float:left; margin:0 0 10px 10px;cursor:pointer; cursor:hand;" src="http://photos1.blogger.com/blogger/
5304/92/320/DSCF0048%201280.1.jpg" border="0" alt="" /></a>
<br />
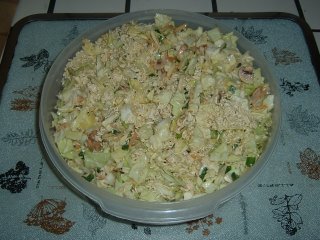
Chuck's <a href="http://nitecruzrrecipes.blogspot.com/
2005/07/cabbage-shrimp-salad.html">Cabbage / Shrimp Salad</a>
<br clear="left">
And the best thing is, this is totally healthy (if you use low carb Cannola oil).
<br> - You now have a solitary photo, floating to the left, but with some text captioning it.
Chuck's Cabbage / Shrimp Salad
And the best thing is, this is totally healthy (if you use low carb Cannola oil).

Or, add the image as a button, linking to another post.

Check out my other recipes too (Just click on the picture)!
<a href="http://nitecruzrrecipes.blogspot.com/2005/07/cabbage-shrimp-salad.html"><img style="border-width:0px; float:left; margin:0 10px 10px 20px;cursor:pointer; cursor:hand;" src="http://photos1.blogger.com/blogger/5304/92/320/DSCF0048%201280.1.jpg" border="0" alt="" /></a>
<br />
Check out my other recipes too (Just click on the picture)!
<br clear="left">
Or maybe you just want the full size version of the photo to open in a new window.
If you're in any way curious about how I setup this page, and showed the HTML so neatly, see my tutorial on anchors and HTML. And you can always examine the code for any specific page element, if you're using Firefox. Or check out the W3 Schools tutorials, that tell you all about each HTML tag, as used above.
You don't have to host your photos on Blogger. There are any number of free hosting services, such as Photobucket, Picasa, and Webshots, that will allow you to upload any number of pictures to their server. Peter, with Blogger Tips and Tricks: Comparison between hosting images with Blogger and photobucket, provides an interesting analysis of Photobucket.
Comments
In your example, pls show where to put the html code below for viewing in new window when people click to see original large image? This is to avoid people having to click "Back" button.
target="_blank"
Opening A New Window
The Profile is a page element, that displays portions of your Google profile. It's not configurable.
You setup your Google account, and the profile for that. Then you add a Profile page element. And you're right, the photo has to be hosted already. You'll probably host it on Blogger, using the instructions above.
I don't want to have a clickable picture in my entries.
Thanks in advance.
Just remove the link portion of the uploaded image code, and you end up with an embedded picture.
I have added the target="_blank" and it worked perfectly. The issue now is that my picture doesn't fit to the new window and my readers got to scroll. Could you adivse if there's a way to make image display to fit the new window?
Thanks!
This sounds like a problem that comes and goes with Blogger and pictures. IMHO, you'll be better off starting a new thread in Google Blogger Help, and asking this question.
I've been using the Picasa desktop application to select and upload pictures to my blog. In many cases, however, those pictures are already uploaded on my Picasa web space. I've seen some discussion of trying to cut and paste Picasa Web URLS, but it doesn't look like it works. I guess I'm surprised there isn't an easy way to select images from your Picasa web space to link to your blog.
-Sam